Best Way to Hang Pictures at Home


For homeowners in Dyer and Crown Point looking to improve a living space, a blank wall above a new sofa or console often creates the same pause. The frame's leaning against the furniture, the hammer's in hand, and one wrong nail can mean a crooked picture or a damaged wall. The best way to hang pictures starts before measuring height. It starts with matching wall type, frame weight, and viewing purpose so the fastener, placement, and furniture below work as one plan.
Starting With the Right Picture and the Right Wall
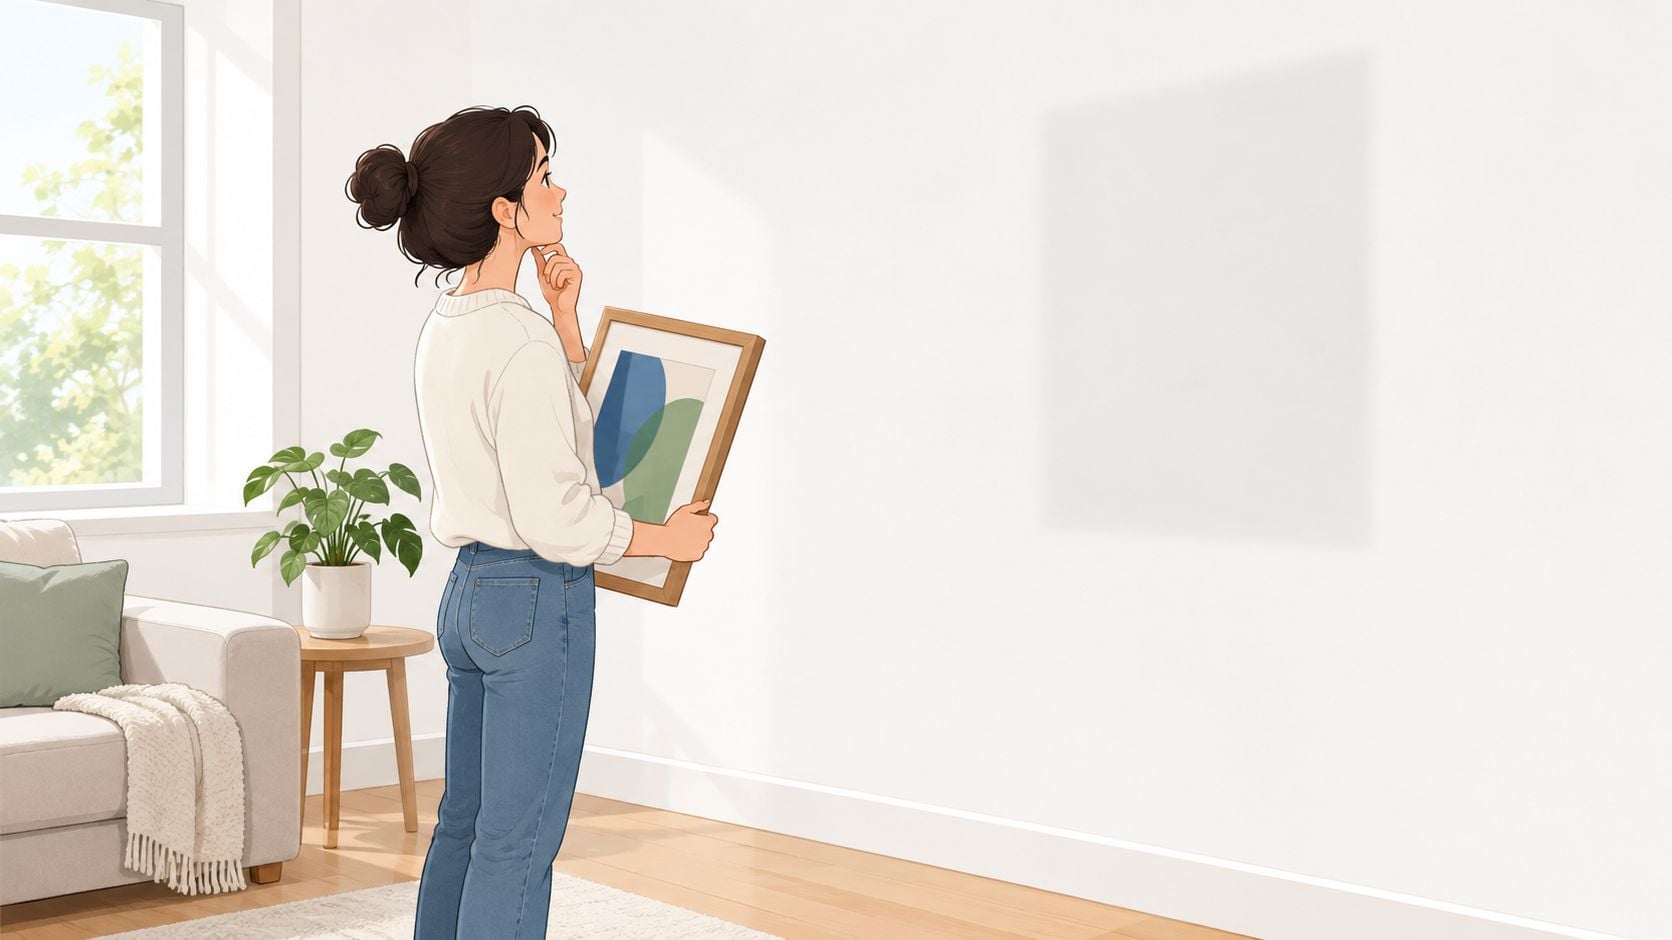
A homeowner in Schererville unboxes a framed print for the wall behind a Flexsteel sofa, then spots the problem. The piece looks light, but frame, mat, backing, and glass make the complete load heavier than expected. Guessing at that weight is where failures begin.
Weigh the Whole Piece First
A bathroom scale works well enough. The homeowner weighs the finished frame, not just the artwork, then writes that number on painter's tape on the back. That single number decides whether a simple hook is enough or whether a hollow-wall anchor, a stud, or a French cleat is required.
Wall construction matters just as much. Drywall sounds hollow when tapped and needs an anchor rated above the load when no stud is available. Plaster over lath feels harder and can crack if drilled carelessly. Masonry and brick need masonry bits and anchors made for that substrate, while a wood stud accepts a screw directly and holds with far more confidence than drywall alone. A secure installation starts with weighing the complete framed piece, identifying the wall substrate, and locating a stud whenever possible, as detailed in guidance on choosing the correct wall anchor for hanging pictures.
That caution is justified. Recent DIY research found that 24% of respondents lack confidence hanging mirrors or picture frames, 34% worry that hanging products will not be strong enough, and 26% have damaged walls or surfaces by using the wrong tools or equipment, according to consumer DIY research on hanging confidence and wall damage.
Decide the Job the Picture Must Do
Placement follows purpose. A single statement piece above a Bassett console needs calm, centered spacing. Family photos in a hallway need clearance from passing shoulders. Art above a bed needs extra security. Those decisions shape height long before a pencil touches paint.
Fresh paint changes the sequence too. Anyone repainting first can use practical wall painting tips to get the surface right, then allow proper curing before drilling. Homeowners planning the wall as a focal point can also review ideas for a balanced accent wall before committing to holes.
Practical rule: The strongest anchor isn't automatically the safest choice. The right anchor for the wall, installed correctly, beats an oversized anchor installed badly.
That first decision, wall plus weight plus purpose, controls every step that follows.
Tools and Prep Before You Touch the Wall
A short, honest toolkit prevents the mid-project hardware run. Most homeowners don't need specialty gear. They need a tape measure, pencil, painter's tape, level, stud finder, drill with a small bit set, screwdriver, and safety glasses. A laser level helps on gallery walls, but a standard level handles single frames perfectly well.
Why Each Tool Earns Its Place
The tape measure and pencil handle height calculations. Painter's tape handles the mock-up, letting a homeowner outline the frame at full size and live with the position for an hour before drilling. The stud finder locates framing behind drywall, and the level confirms both marks sit at the same height. The drill matters because anchor performance depends on hole size. An oversized hole weakens the hold even when the anchor itself is well rated.
A second pair of hands is close to mandatory for wide or heavy frames. One person holds the piece at the intended height while the other steps back and judges spacing against the furniture. That simple check catches most placement mistakes, and it explains why 37% of respondents lack confidence measuring placement in the DIY research cited earlier. Measuring alone, at arm's length, invites error.
Prep includes the back of the frame. Loose wire, bent D-rings, or a sawtooth bracket mounted off center should be fixed before marking. Bumpers on the lower corners keep the frame sitting flat and protect paint. Even small decorative objects follow the same preparation logic, which is why Bridle Up Hope Shop's horseshoe guide makes a useful reminder that orientation and hardware checks come before the first hole.
The One-Trip Shopping Checklist
- Picture hooks: Sized above the frame's actual weight, not equal to it
- Drywall anchors: Matched to wall thickness, with the correct drill bit paired to each anchor
- Masonry bits and anchors: Reserved for brick, block, or concrete, never substituted with drywall hardware
- Painter's tape and pencil: For full-size mock-ups and removable marks
- Safety glasses: Essential when drilling plaster or masonry
With tools laid out and the frame's hardware inspected, the homeowner can move to the decision that keeps the picture on the wall.
Matching Anchors and Hooks to Wall and Weight
Fastener choice isn't a matter of preference. It's a match between load, wall substrate, and how the frame hangs. A light print on a nail hook, a mid-weight frame on a self-drilling anchor, and a heavy mirror on toggle bolts are three different jobs, and treating them as one job causes most failures.
The Safety Factor Most People Miss
Published anchor ratings are test-condition maxima, not working loads. A conservative engineering approach divides the manufacturer's maximum rating by four, meaning a nominally 100-pound anchor should be treated as supporting approximately 25 pounds for a valuable or heavy frame, as explained in the anchor selection guidance cited earlier. Ratings drop further when drywall is damaged, the hole is oversized, or the frame projects outward and creates leverage. Door slams and vibration justify additional caution.
Stud mounting changes the equation. A screw driven into solid framing with enough penetration provides substantially greater holding power than a drywall-only anchor. When the desired position lines up with a stud, that option wins. When it doesn't, the anchor must be rated well above the load and installed exactly as specified, with correct drill diameter, embedment, and tightening.
For large, heavy, or valuable artwork, museum installation practice favors two-point hanging with sturdy D-rings positioned approximately one-quarter to one-third of the frame height down from the top, connected with properly tensioned wire, as set out in museum installation guidelines for D-rings and wire hanging. Two fasteners divide the load and stop rotation. A French cleat goes further for exceptional weight, spreading force across the upper edge and engaging multiple studs. The same load-spreading logic applies to wall furniture, as covered in guidance on mounting a bookcase on a wall.
Fastener Pick by Wall Type and Frame Weight
| Frame Weight | Drywall | Plaster | Masonry / Brick | Best Pick |
|---|---|---|---|---|
| Light | Picture hook or stud screw | Picture hook into lath or stud | Small masonry anchor | Hook rated above load |
| Medium | Self-drilling anchor, derated | Toggle through lath, with care | Masonry anchor and screw | Anchor with safety factor applied |
| Heavy | Toggle bolts, two points | Stud fasteners strongly preferred | Heavy masonry anchors | Two-point D-ring hanging |
| Oversized or valuable | French cleat into studs | French cleat into studs | Cleat with masonry fasteners | French cleat |
Plaster and masonry reward patience. Plaster can crumble around an anchor that expands too aggressively, and brick mortar joints hold less reliably than the brick itself. Homeowners uncomfortable drilling either substrate should treat that discomfort as useful information. Professional installation costs less than repairing a cracked plaster wall or replacing a fallen mirror.
Measuring and Marking So It Hangs Right the First Time
Accurate marking depends on one measurement most homeowners skip. The distance from the top of the frame to the hanging point changes under load, because picture wire stretches into a shallow peak when the frame's weight pulls on it. Measuring that distance with the wire slack produces a picture that hangs lower than planned.
The Two-Person Measuring Method
One person lifts the frame by its wire, holding it at the center point where the hook will sit, so the wire takes realistic tension. The second person measures from the top edge of the frame down to that peak. That measurement transfers to the wall. For D-rings without wire, the distance from the top edge to each ring is measured directly, and the spacing between rings is recorded just as carefully.
Height is then calculated from the picture's center, not its top. That's the contrarian detail that prevents the most common mistake in picture hanging. A homeowner who marks where the top should go, then guesses downward, almost always ends high. Marking the intended center first, then adding half the frame height, then subtracting the wire measurement, puts the hook exactly where it belongs. The same measure-twice discipline applies across the room, as shown in guidance on how to measure furniture accurately.
Painter's tape turns the calculation into something visible. A full-size tape outline of the frame, leveled and viewed from across the room, reveals whether the piece crowds a door casing, fights a lamp, or floats too far above the furniture. Adjustments at the tape stage cost nothing. Adjustments after drilling cost filler and touch-up paint.
Final Checks Before Drilling
- Level both marks: For two-point hanging, confirm both fastener marks sit on the same horizontal line
- Confirm stud locations: Re-scan at the exact marks, not nearby, and shift the layout if a stud is close enough to use
- Dry fit the hardware: Hold the frame against the tape outline and verify the wire reaches the marked points
- Check for hidden hazards: Stay alert near outlets and switches, where wiring may run vertically in the wall cavity
Mark the wall once, correctly, and the hanging itself takes minutes. Rush the marks, and the picture announces it every day.
Once those checks pass, the anchor goes in, the frame goes up, and a final level reading across the top edge confirms the work.
Placing Single Frames and Gallery Walls With Intention
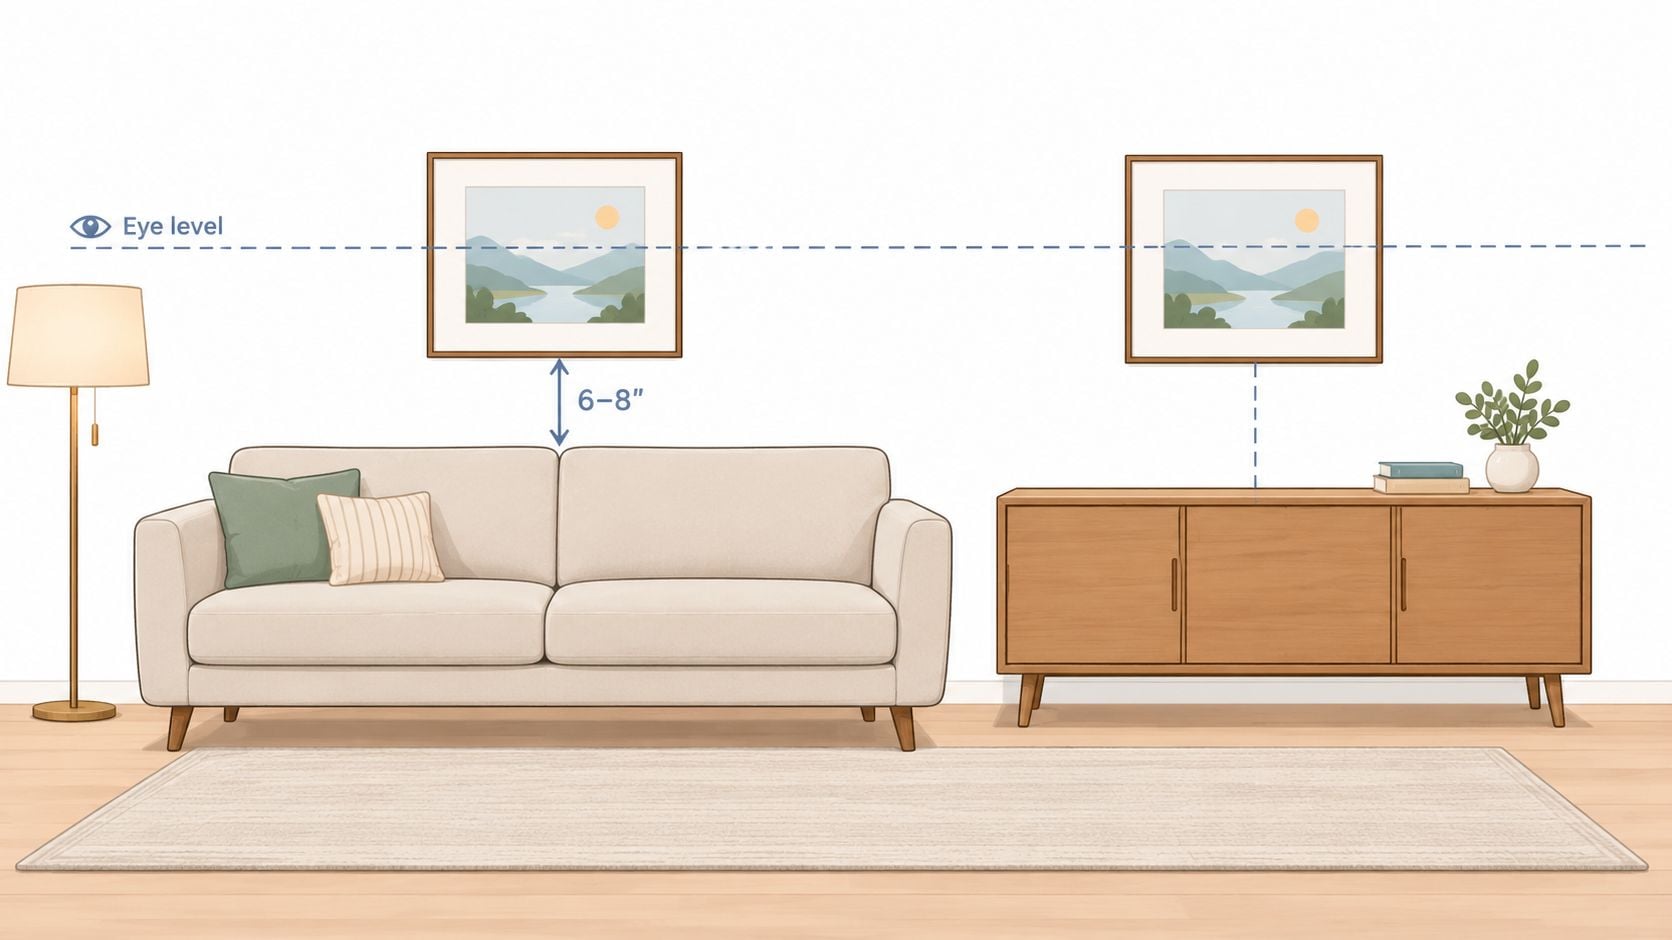
Height rules exist because eyes need a resting point. For a single picture on an open wall, the artwork's visual center belongs at approximately 57 inches above the floor, a museum and gallery benchmark that corresponds roughly to average standing eye level, as described in wall art placement guidance using the 57-inch center benchmark. Measuring to the center, not the top edge, keeps art from drifting too high, which remains the most frequent decorating error in otherwise finished rooms.
Art Above Furniture Follows the Furniture
Above a sofa, the eye-level rule gives way to the furniture relationship. Homeowners should leave approximately 6 to 8 inches between the top of the sofa back and the bottom edge of the lowest frame, keeping the composition connected without crowding it or exposing it to contact, as recommended in home gallery guidance on clearance above a sofa. For a multi-piece arrangement, that clearance applies to the lowest frame in the grouping.
Centering follows the furniture too. A frame above a console centers on the console, not on the wall, even when the console sits off center in the room. When the furniture is wider than the frame, lamps or stacked books on each side can balance the composition without moving the art. Above a bed, the headboard plays the console's role, and the frame centers on the bed. Scale guidance, including sizing options such as a 12 picture frame arrangement, helps homeowners judge whether one large piece or a grouping suits the furniture width.
Rooms in St. John, Munster, and across Northwest Indiana often pair this kind of wall with Custom Order furniture beneath it. A made to order Amish solid wood console or a Canadel dining set designed to fit the room gives the artwork a deliberate anchor, and Special Financing, subject to credit approval, can make that bespoke piece fit the household budget. Groen's Fine Furniture offers those custom order services alongside Flexsteel and Bassett seating, presented as one local option for homeowners composing the furniture and art together.
Gallery Walls Work as One Composition
A gallery wall succeeds when it's treated as a single piece. The homeowner calculates the overall height of the planned arrangement, divides it by two, and positions that midpoint at about 57 to 60 inches from the floor, rather than centering every individual frame at eye level, as explained in gallery wall spacing guidance on treating the arrangement as one composition.
Consider a family photo wall over a sectional. The layout gets arranged on the floor first, largest frame near the center, smaller frames filling outward with consistent gaps. Kraft paper templates then move the arrangement to the wall for a full-size preview. Only after the templates look right from the room's entrance do the fasteners go in, starting with the central frame and working outward so small errors don't compound across the wall.
Safety, Clearance, and Living With Real Traffic
Decorating advice usually stops at height. Real homes add children, older adults, narrow hallways, and doors that swing. A frame that's perfectly centered can still be wrong if it protrudes into a walking route or hangs where a door handle will strike it.
Clearance Numbers Worth Borrowing
U.S. Access Board guidance for public environments limits wall-mounted objects projecting into circulation paths to 4 inches when their leading edges fall between 27 and 80 inches above the floor, while requiring 80 inches of headroom, as summarized in design guidance on picture height and circulation clearance. Those rules don't govern private homes, but they offer a conservative benchmark for entryways, stair landings, and busy hallways. A deep shadow-box frame that projects well past that limit belongs on a wall people view, not a wall people brush past.
Public spaces plan placement around visibility and traffic in the same deliberate way, which is why best donor wall placement tips offer a helpful parallel for homeowners thinking about sightlines and flow. At home, the equivalent checks are simple. Swing every nearby door fully open. Walk the hallway carrying a laundry basket. Sit in the actual chair and confirm the art reads at seated eye level, which often argues for hanging slightly lower in dining rooms and reading corners.
Heavy frames above a child's bed deserve a different plan entirely. Two-point hanging into studs, security hardware, or relocating the piece above a tall dresser all beat a single hook over a pillow. The same caution applies above seating where heads lean back against the wall, a situation also relevant when weighing art above a TV and nearby seating.
Coordinated safety: Picture hanging shouldn't be treated as an isolated décor task. It belongs in the same conversation as furniture anchoring and room traffic.
That coordination matters because only 27% of surveyed U.S. adults had anchored furniture, despite continuing tip-over risk, according to the circulation and safety guidance cited above. Anchoring the bookcase and hanging the frame securely are two halves of the same job in a family home.
Glare finishes the safety picture. Frames opposite bright windows can mirror the room instead of showing the art, and a slight shift along the wall or a tilt adjustment often fixes it. Wire-hung frames should stay reachable for occasional straightening, since vibration gradually walks them off level.
Troubleshooting and Knowing When to Call a Pro
Most hanging failures announce themselves slowly. A frame tilts a little more each month. A mirror sits slightly lower than it did. An anchor feels loose when the frame is lifted for dusting. Homeowners tend to shrug at those signs, and that shrug is the actual problem.
Common Failures and Honest Fixes
An anchor that spins in its hole has lost its grip on the drywall, usually because the hole was oversized or the anchor was overtightened. The fix isn't a bigger screw in the same damaged hole. The anchor comes out, the hole gets patched, and a toggle style anchor goes into sound material nearby, or the fastener moves to a stud.
A frame that repeatedly tilts almost always hangs from a single central point, so gravity and vibration rotate it freely. Converting to two D-rings on two fasteners ends the rotation. Museum guidance cited earlier specifies sturdy D-rings with wire looped back through itself for security, and that detail matters because a single undersized hook carrying the whole load is a named failure mode.
A heavy mirror that creeps downward signals anchor fatigue in hollow drywall. Rechecking fastener tightness after installation catches early movement, especially in homes subject to vibration or seasonal shifting. Confirmed creep means upgrading the mounting, typically to a French cleat engaging studs, before the mirror makes the decision on its own schedule.
Clear Criteria for Professional Installation
- Oversized mirrors and exceptionally heavy frames: Loads that exceed comfortable two-person handling
- Valuable or irreplaceable artwork: Pieces where a fall means real financial or sentimental loss
- Masonry, brick, or fragile plaster: Walls outside the homeowner's drilling experience
- Stair landings and high placements: Any install where a ladder fall or dropped frame creates serious danger
Calling a professional for those jobs isn't a concession. It's the same decision-first thinking applied directly. The homeowner who hangs light and medium frames confidently, and delegates the oversized mirror over the stairs, has understood the best way to hang pictures better than the homeowner who attempts everything with one hook assortment.
For rooms still missing the furniture that gives art its anchor, the Dyer and Crown Point showrooms let families test drive comfort in person and design it your way with custom orders. That multigenerational, 5-star service approach has served Northwest Indiana since 1983, pairing honest pricing with white-glove delivery so the finished room, art included, feels composed rather than assembled.
Visit Groen's Fine Furniture in Dyer or Crown Point today to explore custom options, from Canadel dining and Amish solid wood pieces to Flexsteel seating that gives new artwork the right foundation, and ask about special financing plans, subject to credit approval. Let the Groen family help create a home that's loved, one well-hung picture and one lasting piece of furniture at a time.